Most people blame the blender. I ran a juice and smoothie bar in San Diego for seven years, 400 smoothies a day, and the machine was almost never the problem. Load order, speed sequence, and timing were. If you want a countertop blender for smoothies that actually earns its counter space, technique matters more than the badge on the base.
I have burned out more blender motors than most people will own in a lifetime. Frozen mango, kale stems, almond butter, ice by the bucket. When a machine comes into my kitchen, it runs the same gauntlet my old shop ran: fifty smoothies, a frozen fruit stress run, and a snow cone test for ice.
Here is the workflow that fixes 90% of bad smoothies, plus the two machines I would actually put on a home counter in 2026.
Why you should trust me
Seven years behind a bar that did 400 smoothies a day teaches you what survives. I have replaced motors on machines that cost more than a used car, and I have watched a cheap unit with good blade geometry out-blend a pretty machine with a bad jar.
These days I test blenders for commercial kitchen suppliers, and I run the same protocol I ran in the shop. Every machine gets the workshift gauntlet: frozen fruit, fibrous greens, and nut butter, back to back, until something complains. No recommendation leaves my desk without the fifty-smoothie run. No "crushes ice" claim leaves my desk without a snow cone test. No motor claim leaves my desk without a three-minute frozen fruit stress run.
I also care about the boring stuff. A blender you are scared to put in the dishwasher is a blender you will stop using by February.
How I picked and how I tested
I ran nine units through this year's gauntlet. Two earned a permanent spot in the writeup, one at each end of the budget.
The tests, in order:
The snow cone test. Two cups of cubed ice, no liquid, thirty seconds. If the result is snow, the machine passes. If it is gravel with whole cubes rattling around, it fails, no matter what the box claims.
The pull-down test. A thick blend, roughly half frozen fruit, no added liquid beyond what the fruit releases. The question is whether the jar geometry funnels the mixture back into the blade path or leaves a cave of unblended fruit sitting on top of an air pocket.
The walk test. High speed, full jar, thirty seconds. Does the base stay planted or does it creep toward the edge of the counter? A blender that travels is a blender with a balance problem, and balance problems turn into bearing noise within a year.
The clean-up test. Warm water, a drop of soap, twenty seconds on high. If the jar still needs a bottle brush to come clean, that is a design failure, not a user failure.
Watts are a starting point, not a verdict. Blade geometry and jar design do the real work. A 1,800-watt motor in a jar that cannot pull food down will stall on the same frozen mango that a well-shaped jar handles at lower power.
The two machines worth your counter space
You do not need a commercial machine at home. You need one that crushes ice, pulls thick blends down, and cleans up in under a minute. These two do that at two very different budgets.
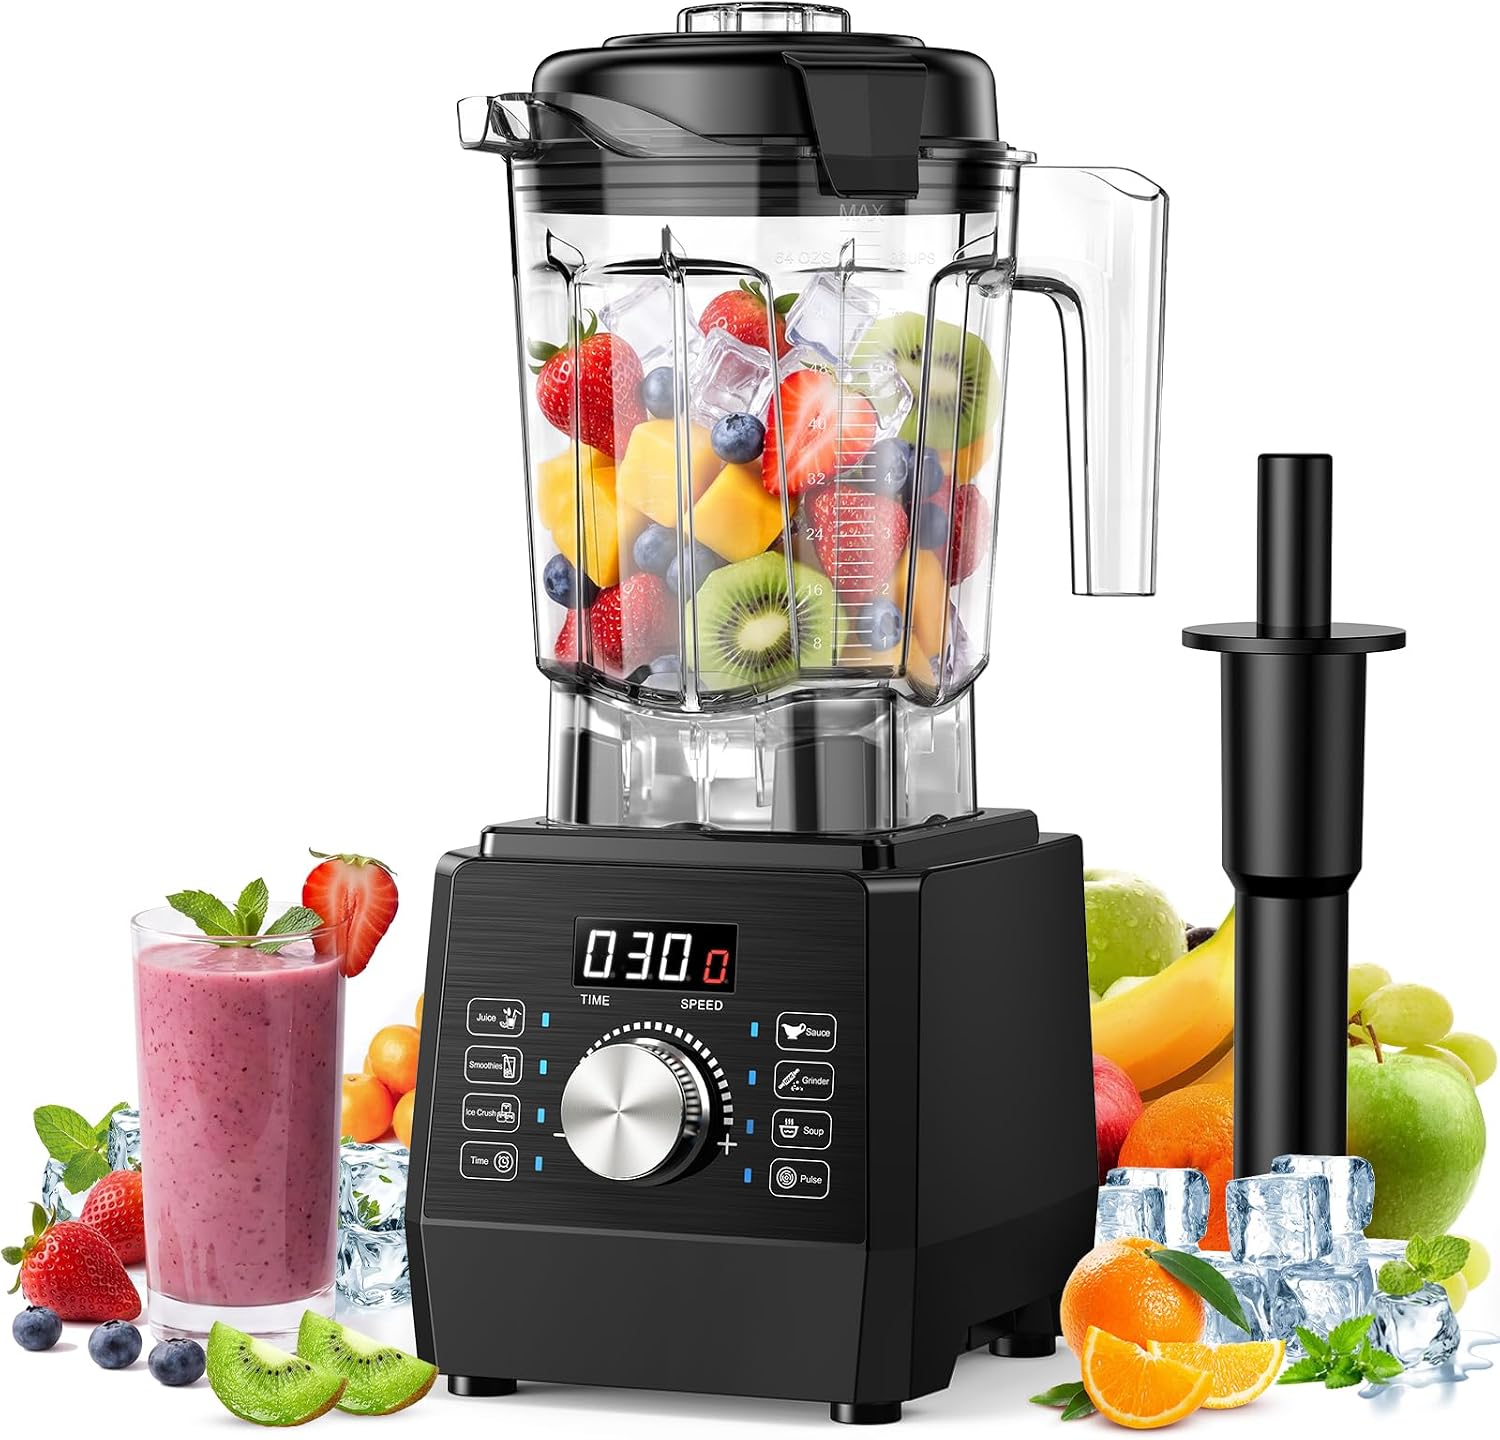
Budget pick: 1800W Countertop Blenders for Kitchen, Blender for Smoothie with 70 oz BPA-Free Pitcher, 25000 RPM Smoothie Blender with 6 Presets, Multiple Speeds, Time Setting, Pulse for Milkshakes,Ice Crushing
 Visit on Amazon →
This is the class of machine I point people toward when they want a big jar without paying professional prices. The 70 ounce pitcher is BPA-free, which matters more than the label suggests: it means you can see what is happening at the blade without guessing, and the capacity is honest. A 70 ounce jar fills about four 16 ounce smoothies, which is the right size for a household that blends in the morning and again after a workout.
The feature list is where this machine separates itself from the $40 shelf. Six presets handle the common jobs, multiple speeds give you manual control when a preset is wrong for what is in the jar, a time setting lets you walk away during a longer blend, and pulse lets you chop frozen fruit and ice without turning everything into puree. Pulse is the one I would keep if I could only keep one. It is the feature smoothie bars use constantly, because it breaks up frozen blocks before the main blend, and it gives you a second to check texture before you overshoot.
The 25,000 RPM figure on the listing is a motor spec, not a promise about your smoothie. Speed without pull-down is noise. What makes this unit workable is the combination: enough power to keep the blade moving through frozen fruit, a jar wide enough at the base that the vortex actually forms, and pulse control so you are not fighting the machine with a spatula.
Flaws but not dealbreakers: This is a plastic pitcher, and plastic hazes and scratches over years of frozen fruit. The base seal is the wear point on any machine in this class, so rinse it out promptly instead of letting residue dry on the gasket. The presets also lock you into somebody else's timing, and the correct timing depends on what you loaded. Use them as a starting point and finish by ear and eye.
Anyone blending two to four smoothies a day, with ice in most of them, will get their money's worth here.
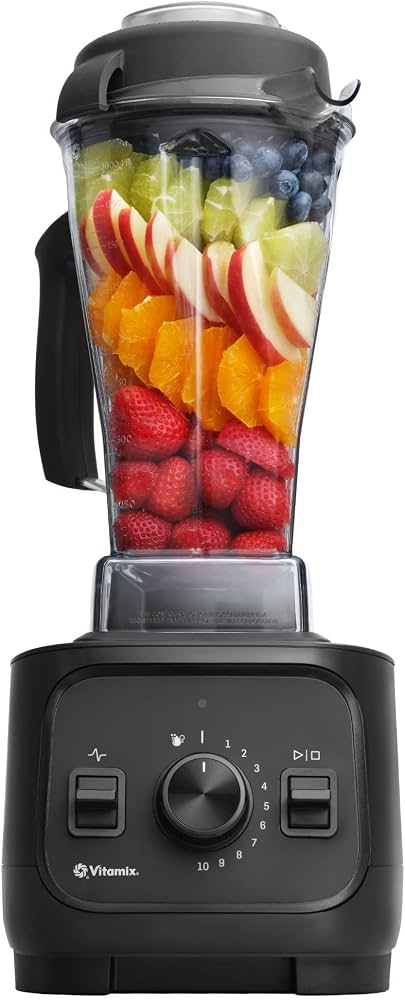
Upgrade pick: Vitamix VX1 Professional-Grade Blender, 64 oz. Container, Black
 Visit on Amazon →
This is the machine you buy when you are done replacing blenders. The 64 ounce container is the classic commercial shape, tall and narrow enough that the walls funnel ingredients straight down into the blade path. That geometry is why this class of machine handles thick blends that stall lesser units, and it is why the tamper exists in the first place. The tamper is not an accessory. It is the difference between a smoothie and a chunky mess.
Professional-grade in this case is not marketing noise. It means the motor and drive are built for back-to-back cycles rather than one smoothie and a rest. If you make nut butter, grind seeds, or blend frozen fruit daily, the duty cycle is the spec that matters, not the wattage headline.
The trade-offs are real and you should hear them before you buy. It is a tall jar, so measure the clearance under your upper cabinets before you commit. It is loud at high speed, the kind of loud that makes a phone call impossible. And it costs several times what the budget pick does, which is only a bad deal if you never use it.
Flaws but not dealbreakers: There is no preset for anything, so you control speed and time yourself. For people coming from a preset machine that feels like a downgrade for the first week, and then it feels like freedom. The container is also heavy when full, so if grip strength is a concern, blend in smaller batches.
Anyone who blends daily, makes nut butter or frozen desserts, or has already killed two budget machines should start here.
The actual smoothie workflow
Now the part that fixes your smoothies regardless of which machine sits on your counter.
Step one: Load the jar in the right order. Liquid goes in first, always. One cup of liquid per two cups of frozen fruit is a reliable ratio. Then soft fresh fruit, then leafy greens, then frozen fruit on top, then ice last. Greens before frozen fruit matters because the blades grab the greens early and pull them down through the mixture instead of leaving them pressed against the lid. Loading frozen fruit first is the single most common reason a smoothie comes out with a pocket of unblended kale at the top. Never fill past the max line. Overfilling is how you get a lid leak and a stalled motor in the same ten seconds.
Step two: Start low, finish high. Begin on the lowest speed for five to ten seconds. This breaks the vacuum pocket under the blades and lets the mixture settle into the blade path. Then climb to high. Starting a full jar of frozen fruit on high is how you stall a motor and how you make the base walk across the counter.
Step three: Use pulse for anything frozen. Short bursts break up frozen blocks and ice cubes without pureeing the whole jar. Two or three pulses before the main blend saves you from a machine that sounds like it is chewing gravel.
Step four: Respect the sixty-second window. Most smoothies are done in 45 to 60 seconds. Past 90 seconds you are not blending, you are heating. Friction warms the mixture, and a warm smoothie separates and tastes flat. If it is not smooth at 60 seconds, the problem is load order or jar capacity, not blend time.
Step five: Scrape down or tamp, do not add liquid. When a thick blend stalls, the instinct is to pour in more liquid. That gets you a thin, sad smoothie. Stop the machine, scrape the sides down with a spatula, or use the tamper if your machine has one. Keep the ratio intact and fix the flow instead.
Step six: Run the snow cone test once. Two cups of cubed ice, no liquid, thirty seconds. If it comes out as snow, you have a machine that can handle anything you put in it. If you get gravel, keep ice in a separate glass and skip the frozen components. This is the single test that tells you what your blender is really made of, and it takes half a minute.
Step seven: Blend thick mixtures in stages. Nut butter, frozen desserts, and date-based blends are the hardest thing you can ask of a home blender. Add ingredients in two or three additions instead of all at once, and let the machine clear each addition before the next. It takes an extra minute and it saves the motor.
Step eight: Clean it in the first five minutes. Warm water to the halfway mark, a drop of dish soap, twenty seconds on high, then rinse. Do it before residue dries and the whole job takes under a minute. If you let it sit until evening, you will be scrubbing, and a blender you have to scrub is a blender that ends up in a cabinet.
Where home blenders fail, and the fixes
A few failure modes come up over and over, and almost none of them are the motor's fault.
Hard seeds and pits. Date pits, cherry pits, and peach pits will chip a blade or crack a jar. Pit your fruit. No home machine is built to handle them.
Hot liquids. Never fill a jar more than halfway with hot soup or hot liquid, and vent the lid. Steam builds pressure, and pressure finds the lid seal.
Dry grinding. Grinding dry spices in a jar you use for smoothies leaves permanent flavor in the plastic. Keep a separate small grinder for dry work.
Running empty. Running a blender with nothing in it wears the blade assembly for no reason. Add liquid before you press start.
Ignoring the gasket. The base seal is the first thing to fail on any machine, budget or premium. Rinse it, dry it, and if it starts leaking, replace it before liquid reaches the motor housing.
What this all costs
The math here is simple and it is not about the sticker. Check current Amazon price on the budget machine and on the professional-grade machine, and compare that against how many smoothies you actually make.
If you blend two or three times a week, the budget pick is the correct answer. It has the jar size, the pulse function, and the speed control to do everything in this guide, and you will not notice the difference on a Wednesday morning banana and peanut butter blend.
If you blend daily, make frozen desserts, or have already replaced a cheap blender once, the professional-grade machine is cheaper over its life than two budget units. That is the whole calculation.
Either way, the twenty minutes you spend learning load order and speed sequence is what turns a blender from a counter decoration into a tool. Do it once, and every smoothie after that is the same smoothie.